Compile android apps using android command-line tools
Last updated at 26 January 2021 at 12:00pm
I happen to use a very old machine with 2gb ram and pentium dual core CPU as my preferred development machine.
The main android recommended tools for development are android studio and gradle. While these tools are very good, they require high-end PCs to run smoothly.
In this article I will discuss how you can compile and run your android applications through the commandline without android studio.
Contents
- Installing requirements
- Code the app
- Compiling
- Aligning and signing the apk
- Running the app
- Using androidx and 3rdparty libraries [part 2]
1. Installing requirements
Go ahead and download the android command line tools from android studio download page and extract it in your preferred location.
Next, you need to install sdk packages. Locate sdkmanger.bat from the extract location and run the following command.
sdkmanager "platform-tools" "platforms;android-29" "build-tools;29.0.2"
This will install the packages for the android sdk. You can set an enviroment variable to the sdk’s location for easier reference.
Confirm that you have java installed.
java -version
The output should look somthing like :
openjdk version "1.8.0_265"
OpenJDK Runtime Environment (build 1.8.0_265-b01)
2. Code the app
Now lets create a simple applicaiton that displays Hello World in a text view.
├───res
│   │   values.xml
│   ├───layout
│   │       main_activity.xml
│   └───values
│           values.xml
│───src
│   └───com
│       └───helloworld
│               MainActivity.java
│   AndroidManifest.xml
Create a directory structure as the one shown above. You can use the following commands to create the directories.
mkdir src src/com src/com/helloworld
mkdir res res/layout res/values
And the following to create the files.
touch AndroidManifest.xml
touch src/com/helloworld/MainActivity.java
touch res/values/values.xml
touch res/layouts/main_activity.xml
AndroidManifest.xml:
<?xml version="1.0" encoding="utf-8" ?>

<manifest
	xmlns:android="http://schemas.android.com/apk/res/android"
    package="com.helloworld"
    android:versionCode="1"
    android:versionName="1.0" >

<application  android:label="@string/appname"
    >
    <activity android:name=".MainActivity">
        <intent-filter>
            <action android:name="android.intent.action.MAIN"/>
            <category android:name="android.intent.category.LAUNCHER" />
        </intent-filter>
    </activity>
</application>

</manifest>
com/helloworld/MainActivity.java:
package com.helloworld;

import android.os.Bundle;
import android.app.Activity;

public class MainActivity extends Activity
{
	public void onCreate(Bundle savedInstanceState)
	{
		setContentView(R.layout.activity_main);
	}
}
res/values/values.xml:
<resources>
	<string name="appname">Hello world</string>
</resources>
res/layouts/main_activity.xml:
<LinearLayout
	xmlns:android="http://schemas.android.com/apk/res/android"
	xmlns:tools="http://schemas.android.com/tools"
    android:layout_width="match_parent"
    android:layout_height="match_parent"
    android:orientation="vertical"
    >

<TextView
    android:id="@+id/tv"
    android:layout_width="match_parent"
    android:layout_height="wrap_content"
    android:text="Hello world"
     />
</LinearLayout>
3. Compiling our application
Create a directory called build where we will store our generated files.
mkdir build
mkdir build/classes
mkdir build/dex
We start by compiling our resources. This is done using aapt2 (Android asset packaging tool). AAPT2 parses, indexes, and compiles the resources into a binary format that is optimized for the Android platform.
Run the following command to compile the resources.
aapt2 compile --dir res -o build/resources.zip
The --dir flag indicates the location of the resources, and -o indicates the output path.
The output of this command is a zip file resource.zip that is required in the next step, linking.
The linking step creates an apk that has the files generated in the compilation step and also outputs an R.java file.
To link the resources execute the following command:
aapt2 link -I $ANDROID_HOME/platforms/android-29/android.jar \
			  build/resources.zip \
			  --manifest AndroidManifest.xml \
			  --java build/ \
			  -o build/link.apk
-Igives the path to the android platform’s android.jar,-- manifestspecifies the android manifest,-- javaspecifies the path to generate the R.java file.-- ospecifies the output path.
After linking we now go to compiling our java code using javac.
javac -bootclasspath $ANDROID_HOME/platforms/android-29/andorid.jar \
          src/com/helloworld/MainActivity.java build/com/helloworld/R.java \
          -d build/classes
This will compile our code to java bytecode and place the .class files in build/classes directory.
Take note of the R.java file which is the one that was generated in the previous step.
Once we have java bytecode we now convert it to DEX bytecode that runs on android devices. This is done using android’s d8 commandline tool.
To convert into dex :
d8 --classpath $ANDROID_HOME/platforms/android-29/android.jar \
       --output build/classes/com/helloworld/*.class
The output will be a file called classes.dex.
We then need to add this file into our link.apk that was generated in the linking stage.
AAPT1 had an add command that allowed us to add files in the apk.This command is not in AAPT2.
Luckily apk file formats are similar to zip files, so you can either add the classes.dex file manually or use the zip command.
zip -u build/link.apk build/classes.dex
5. Aligning and the apk
Next we need to zip align our apk using the zipalign tool and then sign the apk using apksigner tool.
zipalign -f 4 build/link.apk build/zipout.apk
To sign the application you will need to have a public-private key pair. You can generate one using java’s keytool.
keytool -genkeypair -keystore key.keystore
Signing is done using apksigner command.
apksigner sign --ks key.keystore --ks-pass pass:keystore \
    --out build/final.apk build/zipout.apk
--ksspecifies out key (key.keystore)--ks-pass pass:keystorespecifies the password as “keystore”
The output of this command is an apk final.apk that we will install.
Note: Aligning should come before signing
6. Running the application
To run the apk we need to install it first. We can achieve this using adb install command.
adb install -r build/final.apk
Go ahead and launch the application using adb.
adb shell am start -n helloworld/.MainActivity
You can also launch logcat to check for any debug or error messages.
adb shell logcat -b crash -v color | grep helloworld
Here is a screenshot of the app
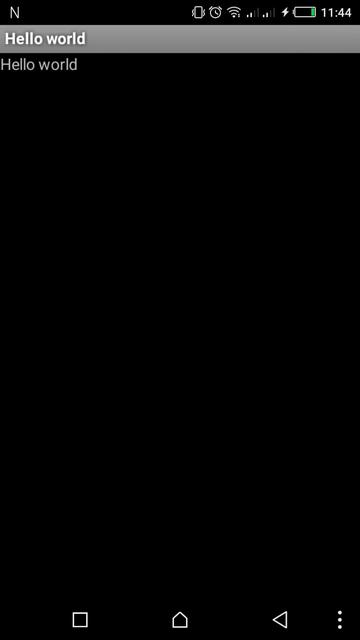
App screnshot
In the next article, I will go through how you can use the android support libraries(androidx) and any other 3rd party libraries in this app.